Monday, December 8, 2014

Kuih Sago

Kuih Sagu is one of my eldest son's favorite sweets. He has been asking me to make this for him for quite some time now. He said that he did not get the chance to buy this kuih when we went back home for the summer holidays. So I decided to make this for him yesterday. The pictures are without the freshly grated coconut coating.


Ruby Red Kuih Sago
Ingredients

1 cup of sagu
2-2/12 cups of sugar
2 1/2 cups water
a pinch of salt
a drop of red food coloring
1 teaspoon of rose essence

some freshly grated coconut steamed with a pinch of salt.

Directions

1. Grease a square cake tin with a little bit of cooking oil. I used a 6" X 6" cake tin
2. Wash and soak the sago in water for about 10 minutes. This helps to remove any excess starch in the sago.
3. Drain the sago in a fine colander.
4. In a pan heat the water and sugar together on medium-low heat. When the syrup starts to boil add the red coloring and the rose essence. Mix well before adding the soaked and drained sago into the boiling syrup.
5. Stir well until the sago turns translucent. There will be some sago that is still white and not cooked but this is OK. Keep stirring until most of the sago is translucent.
6. Pour the cooked sago into the cake tin and level the surface.
7. When the sago is cool, you can  cut into squares and roll them in the steamed coconut before serving.

Note:
1. It is usually quite difficult to cut and maintain the shape of the sagu so it looks better when the sago is rolled in grated coconut.
2. If you want a softer kuih you can use 3 cups of water instead of 2 1/2 cups of water.


Crunchy Cauliflower 65

I finally found a great recipe for crunchy cauliflower 65. This recipe is from Vahchef.  The cauliflower turned out really crunchy and not oily at all. I made this last Saturday and it was a great hit with the family, We are not usually vegetarians on Saturdays but since my daughter is on a vegetarian fast I did not have the heart to cook non veg all the time. So this Saturday we had really delicious vegetarian food.


Crunchy Cauliflower 65


Ingredients

500gms cauliflower

Mix together
1 tablespoon of ginger garlic paste
1 teaspoon cumin powder
1 teaspoon coriander powder
1 tablespoon chopped garlic
1/2 teaspoon garam masala powder
1 teaspoon kashmiri chilli powder
1/2 teaspoon paprika (optional but it gives a deep red color)
1/4 teaspoon turmeric powder
1 cup of cornstarch
1/4 cup all purpose flour
1 teaspoon oil
1/4 cup chopped coriander leaves
1/4 cup chopped curry leaves
salt to taste

cooking oil for deep frying

Directions

1. Wash cauliflower and cut in to florets.
2. In a bowl add the cornstarch and the all purpose flour and mix it well.
3. Next add in all dry spices, ginger garlic paste, chopped coriander leaves and curry leaves and oil and mix well.
4. Add a tablespoon of water at a time to the cornstarch mixture to make a thick batter so that the batter can thickly coat the cauliflowers. Add salt to taste.
5. Add all the cauliflowers to the thick masala batter and mix well so that each cauliflower is well coated with the batter.
6. Heat the cooking oil on medium high.  Deep fry the cauliflowers in hot oil until the cauliflowers are cooked and crunchy.
7. Remove from the oil and drain on paper towels.
8. Serve with hot rice and dhall curry or sambar.

Tuesday, December 2, 2014

Southern Style Mac n CheeCheese

Mac n Cheese
The weather forecast said that today will be a rainy day and a rainy day it is. I just love rainy days. Back where I come from, it practically rained almost every day. I would sit out on my porch with my cup of hot coffee and watch the rain..Yes just watch the rain and I kinda remember doing this since I was little. Yes and it also means that I am sitting out in the porch with my coffee almost every day. Well I am a coffee lover and I love the rain so..don't think that I can complain much and also please dont be judgemental,  I just spend a couple of minutes out watching the rain otherwise it wouldn't in be a waste of productive time just sitting out there drinking coffee and waiting until the rains stops (and it takes a like 1, 2 , 3 hours for the rain to stop).

Well here where I live now you can count the days where it rained. It is usually a drizzle which they call rain here and it sometimes lasts for 5-10 minutes. But today it was a good downpour in the morning. It wasn't too cold but the boys had to wear the puffer jackets and caps which they didn't like at all. For me there was no complains at all, although my jeans was wet to my knee and my shoes were soaking wet. OK I wasn't wearing any rain boots simply because I didn't get one. Can you blame me when you just get rain like a few days in a year and just 1 or 2 days of heavy rain.

Anyways since I was enjoying the rain and the cool weather I thought that the boys might enjoy some hot lunch today. Something that both of them would like, like mac and cheese but it wasn't going to be something out of a box. So I drove down to Albertsons to get the stuff that I needed for the mac and cheese despite the pouring rain and my drenched jeans and shoes and fix the meal before I went back to volunteer at my youngest's class at 10.30am. The mac and cheese turned out great, I couldn't taste it since I was on a fast so I need to wait for my kids to get back home to tell me how it tasted. I need to shoot off in the next 15 minutes to deliver my other sons lunch. The mac and cheese is still warm in the oven and I think he will like it although this lunch is way of his wrestling diet (he is doing wrestling this semester). I just feel sad that my daughter can't enjoy the food that I cook, especially mac and cheese which is also her favorite. Cant wait for her to come back home for the Christmas holidays and I can cook all her favorite food for her. I miss you a lot baby.
Mac n Cheese before going into the oven

Just out of the hot oven..Mmmm smells really good
Ingredients

1 cup of uncooked elbow macaroni (I used the small sized elbow macaroni)
2 cups of 2% milk
1 large egg
1 tablespoon of all purpose flour
1 tablespoon of butter melted
2 teaspoons + 1/2 teaspoon of kosher salt
1/4 tsp of thyme, crushed
1/4 teaspoon of oregano,crushed
1/4 tsp of paprika
1/2 teaspoon of black pepper powder
1 cup of shredded jack or pepper jack cheese(I used the latter)
1 cup of sharp cheddar cheese
1 cup of mexican shredded four cheeses

Direction

1. Preheat the oven to 350F or 180C.
2. Cook elbow macaroni as per package instructions until al-dente
3. Drain the cooked macaroni and rinse in cold water.
4. While the macaroni is cooking beat the egg and mix it with the milk and strain the mixture.
5. Next add the melted butter, 1/2 teaspoon of salt, paprika, pepper , thyme and oregano and mix well.
6. Add in the drained macaroni into the milk, egg and cheese mixture and mix well.
7. Grease a casserole dish and pour the macaroni mixture in. Mixture will look quite runny.
8. Top up the macaroni with the shredded mexican cheese, sprinkle a little bit of paprika and ground pepper and bake it in the oven for about 40 minutes. Leave to cool for around 10 minutes before serving.


Friday, November 7, 2014

Salmon Fried Rice

I took this recipe from Nami's blog from "Just One Cookbook". This is such a great , simple and absolutely delicious recipe. Since I always have salmon in my freezer, I just had to grab the salmon and the rest of the ingredients to make this dish.
Salmon Fried Rice

Ingredients

2 cups of cold cooked short grain rice
2 eggs beaten
1 stalk of green onions, chop the white and green parts separately
4 oz of salmon fillet
1 red jalapeno pepper
2 tsp soy sauce or to taste
2 tablespoon cooking oil

for the salmon marinade,

mix together:
1 teaspoon sesame oil
1 teaspoon soy sauce
1/2 teaspoon brown sugar
1 teaspoon garlic powder
1 teaspoon white pepper powder

Directions

1. Cube the salmon fillet into 1 cm cubes and pour the marinate over the cubed salmon. Leave the salmon to marinade for about 1/2 - 1 hour.
2. After about 1/2 or 1 hour of marination, lightly oil a grill pan and grill the salmon cubes. Once the salmon is done, remove from the pan and keep aside.
3. Heat a wok with 1 tablespoon of cooking oil and scramble the beaten egg. Remove the scrambled eggs from the wok and keep aside.
4. Heat the other tablespoon of oil and add the chopped white part of the green onion.
5. Add the cold rice, scrambled eggs, sliced red jalapeno pepper and stir fry for a minute or two.
6. Add in the grilled salmon and season the fried rice the soy sauce.
7. Finally add in the chopped green onions and fry for another 1 minute.
8. Dish up and serve,

Friday, October 17, 2014

Sri Lankan Semolina Christmas Fruit Cake

My brother is visiting us with his wife and daughter. This is our first Christmas here and we feel so honored to have him and his family celebrate the holidays with us. While chatting with my sis in law, she mentioned that one of her Sri Lankan aunties from UK had made a delicious Semolina Fruit cake. I was so tempted to try it so I googled up some recipes and came out with my own version. I think the Sri Lankan fruit cake has cardamom powder added to the cake. I did not add cardamom in my fruit cake simply because I don't like cardamom flavored cakes. My sis in law said that it was very good and quite similar to the one her aunt made. I was quite pleased with my effort.
Nutty Fruity Semolina Fruit Cake
Fruit Cake - cut up for storing
Ingredients

for the fruit marinade:
250g raisins
125g blackcurrants
125 orange & lemon peel
125g  red cherries
125g green cherries
1 cup chopped or halved cashew nuts
1 tbsp rose essence
1 tbsp vanilla essence
1/4 tsp almond essence
1/2 cup brandy or rum (I used rum)

Put all the ingredients above in a zip lock bag. Shake it well and leave it t marinate in the fridge for at least a day. I left mine in the fridge for a few days. Actually I left it in the fridge until it was Christmas day and I forced myself to bake the Christmas cake. Well....my so called lazy mood... ;)

for the Cake
2 1/2 + 1/2 sticks of salted butter (113g per stick)
240g  dark brown sugar
2 tbsp of golden syrup
220g of semolina
80g of all purpose flour + 1 tsp of mixed spice, sifted together
5 large eggs, at room temperature


Directions
1. Roast semolina under medium low heat with 1/2 a stick of butter until you get a nice nutty smell. Refer to picture below. Leave it to cool.
2. Beat butter, sugar and golden syrup until light and fluffy.
3. Add in eggs one at a time, beating well after each addition.
4. Beat in vanilla essence.
5. Mix the cooled roasted semolina with the flour and spice and add it to the butter-egg mixture, alternating flour and the marinated fruits and nuts.
6. Line a 9 x 9" cake tin with four layers of grease proof paper.
7. Pour cake batter into 9 x 9 " into cake tin and bake in a preheated oven at 300 F for about 21/2 to 3 hours or until a skewer inserted inside the cake comes out clean.
8. Once cake is done immediately remove cake from the oven and drizzle with 2 tablespoons of rum.
9. Cool well before refrigerating. Cut the cake when it is cold otherwise cake will be crumbly.
10. Cake tastes better after a few days. Enjoy :))

Semolina roasted with butter

Tuesday, October 7, 2014

Applewood smoked Pulled Chicken

This recipe is another one of my family favorites. Everyone loves it, so do I but I just keep to the cooking and not the eating. I usually make it without the smoked applewood since I dont have a smoker or grill at home, however I decided to try smoking the chicken in the oven after eating applewood smoked pulled pork at Subway.

Boneless chicken breasts marinated with garlic powder, black pepper and lime juice

Dry Mix

Chicken thighs marinated with the dry rub and onto the smoking skillet for searing
Chicken thighs being seared on the hot skillet

Tomato Sauce and Chipotles in Adobo Sauce
Seared chicken thighs, tomato sauce, mustard, barbeque sauce and chipotles
Damp applewood chips wrapped in foil and ready to go into the oven
After about 2 hours of cooking in the oven. I removed the foil with the applewood chips and I started hitting the meat slowly with my spatula 
All the chicken thigh meat is pulled out and mixed with its sauces
Wallah...delicious applewood pulled chicken with creamy coleslaw on a soft bun
Ingredients

Marinade for the chicken thighs
3 lbs of boneless chicken thigh, remove excess fat and clean (I used organic free range chicken)
2 tbsps garlic powder
1 tbsp coarsely ground black pepper
juice of 1 lime

for the dry rub (mix everything together)
1 cup of brown sugar
1 tbsp kosher salt
1 tbsp paprika powder
2 tbsp onion granules or onion powder
1 tsp cumin powder

For the sauce:
1/2 cup barbeque sauce
1 tbsp French's yellow mustard
1 454g can of tomato puree
1 tbsp of onion granules
2 tsp chipotle paste (I ground "chipotle peppers in adobo sauce". It comes in a tin and you can find it in the hispanic aisle in at the supermarket)

to smoke
Applewood chips

Some kaiser rolls
Creamy coleslaw

Directions

1. Heat a dry cast iron skillet on high heat until it starts to smoke
2. In the meantime, take the dry rub and rub all over the chicken thighs and arrange them on a plate.
3. When the skillet is smoking, pour 1 tbsp of canola oil and grill the chicken thigh with the dry rub,  a few pieces at a time. Once the bottom part of the chicken i browned, turn it over the brown the other side. We dont have to cook the chicken, but just brown the sides.
4. Once the chicken thighs are browned on both sides, remove them from the skillet and place them in a nice dutch oven or casserole dish. I used my Le Creuset large casserole pan which works great for this dish.
5. Once all the chicken thighs are browned, add the sauce mixture to the browned chicken thigh and give it a good mix.
6. Next take two layers of heavy duty aluminium foil over a clean plate and place some damp applewood chips(spray some water over the chips) on it and wrap the foil tightly. Poke some small holes on the top of the foil and place it on top of the chicken. I used this method to get the applewood smoke into my chicken.
7. Place it an oven and set the temperarure to 250F. Cook the chicken for about 2 hours or until the meat is very tender.
8. Once the chicken is done, take it of the oven and remove the applewood wrapped foil.
9. Remove the chicken thighs and hit the chicken thigh gently with a silicone spatula  or pull it with your fingers to separate the meat. This should be pretty easy if the meat is very well cooked
10. Put the pulled chicken back into its sauce and taste for salt and sugar. Add more barbeque sauce if needed.
11. Serve on a toasted kaiser roll topped with some creamy coleslaw and enjoy.


Home Made Candied Lemon and Orange Peel

When my brother and his family were visiting us, my sis-in-law mentioned that she just loved sugee fruit cake. I decided to make some sugee/semolina fruit cake for her but I did not have any fruit mixes and I couldn't find any at the store. So I googled up some recipes to see what proportions of dried fruits I should use. That part came easy but I also had to get some candied lemon and orange peel. Again I googled up some recipes and made my own candied lemon and orange peel for the cake. It is best to keep the candied peel for a few days before adding it to the cake.

Candied Orange Peels

Ingredients

100g of lemon peel, cut into small cubes
100g of orange peel, cut into small cubes
1 cup of sugar
1/2 cup of water
1 tsp of lemon juice.

Directions

Boil sugar, water and lemon juice until sugar syrup is quite thick or reduced to 1/3. Add in the cubed orange and lemon peel and boil syrup for a further 2-3 minutes. Cool and refrigerate.
Bottled Candied Peels


Cranberry Sauce

I have always eaten dried cranberries. This time I had the chance to taste fresh cranberries. They were not as tart as I had expected it to be. It looked like I was the only one who liked munching on these lovely fresh tart cranberries. Since I had a big bag of cranberries and I could'nt eat the whole bag all by myself, I decided to make cranberry sauce.
Fresh Cranberries - just love the red color
Cranberries boiling away

Final Product - Blood Red Cranberry Sauce
 Ingredients

2 lb cranberries

2 cups cranberry juice or orange juice
1 cup sugar

Directions

1. Combine cranberries, juice and sugar and cook the ingredients until the

2. Simmer

Kerala Unniappam

After my trip to Kerala, I was so inspired to try out this recipe. I must say that this recipe turned out better than the unniappams I had in Kerala. It is so great with a cup of "chaya" for our favourite family  "Chaya Time" or "4 mani palagarams".
Kerala Unniappams

My Unniappam pan that I bought in Jogjakarta 

The batter 

Batter consistency

Frying the unniappams

 Unniappams after being turned over 


Ingredients    

2 cups rice flour lightly roasted (I used Easwari Mill Rice flour which is already lightly roasted. I did not have to roast the flour any further)
2 tbsp all purpose flour
½ cup or less brown sugar (I used brown castor sugar and added some gula Melaka syrup for additional flavour and colour)
½ - ¾  tsp salt
½ tsp baking soda
3 pisang berangan (mashed with hands)
5-4 cardamom pods (take a bit of rice flour from the 2 cups of rice flour and grind this with the cardamom pods and add it back to the flour)
50 gms coconut flesh (cut into pieces and roasted in oven until brown)
2 tsps black sesame seeds
1 tsp white sesame seed - roasted slightly

Directions

  1. Mix everything together and add water a little at a time until the batter comes to a a dropping consistency. Around 1-1 ½ cups of water
  2. Leave batter aside for around ½ hour to 1 hour
  3. After about 1 hour or so, heat a unniyappam pan and pour in some oil, at least half full.
  4. Drop spoonfuls of batter into the unniyappam mould.
  5. Make a 180 deg turn  once the bottom of the  unniyappam is firm enough to be flipped over.
  6. Pick unniyappams with a toothpick when they are evenly browned.
  7. Leave the appams on a paper towel to aborb the oil.
  8. Let the unniyappms cool down and enjoy with a hot cup of masala tea.

Note: Unniappams turned out very well. Was not too sweet, was crunchy on the outside and soft on the inside. Perfect…. :)))

I actually got my bronze unniappam pan in Jogjakarta. Of course it is not called a unniappam pan there but something else....


Monday, October 6, 2014

Creamy Coleslaw


Ingredients
1/2 head of green cabbage
1/2 head of purple cabbage
2 carrots, shredded
1/2 cup of chopped red onions
1 tsp celery seeds (optional)
2 tbsp thinly sliced green onions

Mix together:
1 cup mayonnaise
1 tbsp vinegar
1/2 cup of sour cream or greek yogurt
1 tbsp agave nectar or sugar
a dash of French's yellow mustard
pinch of salt

Directions

1. Add the top 6 ingredients into the mayo mixture and toss it well. There is no fixed recipe for this. Everything is just an approximate according to your taste.


White Chocolate Cranberry Cookies

Just another 3 more days before school starts and I have to get back to my usual routine. I have been really enjoying my summer break. I'm gonna miss it. I thought I'd give the kids a treat by making this cookie. While I was making it I felt so sad because this is my daughter's favorite cookie too and she was just too far away to enjoy it. I'll send you some Maa....soon.


White Chocolate Cranberry Cookies


I took this recipe right off the Ocean Spray website. The cranberries I used are also from Ocean Spray.

Ingredients

2/3 cup insated butter, softened
2/3 sugar
2 large eggs or 100g of egg without the shells)
1 teaspoon vanilla essence
 1/2 cups flour
2 1/2 cups old-fashioned oats
1 teaspoon baking soda
1/2 teaspoon fine salt or 1 teaspoon kosher salt
5 ounces dried cranberries
2/3 cup white chocolate chip chunks or chips


Directions
1. Preheat oven to 375ºF.
2. Using an electric mixer, beat butter or margarine and sugar together in a medium mixing bowl until light and fluffy. 
3. Add eggs, mixing well and then add in the vanilla essence.
4. Combine oats, flour, baking soda and salt in a separate mixing bowl. Add to butter mixture in several additional, mixing well after each addition.
5. Stir in dried cranberries and white chocolate chips.
6. Drop by rounded teaspoonfuls onto ungreased cookie tray. Bake for 10-12 minutes o until golden brown. Cool on wire rack.


Royyala Vepudu

We went to an Indian restaurant in Little India for dinner yesterday and I must say that they serve really good South Indian Andhra style dishes. We ordered Royyala Vepudu and it was just simply amazing. After I got back home, I googled for the recipe and made this dish for lunch today. Everyone at home said that my dish was so much better and tastier than the one they ate at the restaurant :)


Ingredients

2 lbs shrimp - shelled and deveined
2 large red onions - diced
2 tbsps ginger-garlic paste
1 large handful of curry leaves - washed and drained
1/2 tsp turmeric powder
1 tbsp paprika or kashmiri chilli powder for the red color without the heat
1 tsp chilly powder
1 tsp pepper powder
1 tbsps coriander powder
1 tsp garam masala powder
1 tbsps lime/lemon juice
2 heaping tbsps of shredded coconut - finely ground with a little bit of water to make a coconut paste
4 tbsps cooking oil
salt and sugar to taste
a handful of coriander leaves - cleaned and chopped finely

Directions

1. Pat dry shrimp with a clean towel.
2. Heat oil in a deep bottomed vessel.
3. When oil is hot add in the diced onion and curry leaves. Add a bit of salt to expedite the frying.
4. Once onions are translucent and become slighlt brown, add in the ginger-garlic paste and continue frying. Make sure that you keep stirring otherwise the ginger garlic paste will burn.
5. Once the raw smell of the gubger-garlic paste is gone, add in the shrimp and continue frying for about 4 to 5 minutes.
6. Turn the heat to medium and add in all the turmeric, chilli powder, paprika or kashmiri chilli powder, pepper powder and coriander powder.
7. Keep stirring until the raw smell of the chilli powder and the other dry powders are gone.
8. Next add in the coconut paste and keep stirring until the oil starts to separate. You will get a very nice aroma from the dish.
9. Pour the lime/lemon juice and garam masala powder. Add salt and sugar to taste.
10. Lastly mix in the chopped coriander leaves and serve with hot steamed basmati rice.

Low Fat Carrot Halwa

I just love eating carrot halwa at Indian lunch buffets. The only set back to this beautiful dessert are the calories. After a few attempts at making this halwa, I came up with this recipe which is not only low fat and low calorie but also very delicious. Now I can have my halwa - GUILT FREE!


Ingredients

1 1/2 lb carrots - washed and peeled
about 1 cup water
1 cup non-fat milk powder
1/2 tsp cardomom powder
1 tsp clarified butter or ghee
1/4 cup cashew nuts - halved or chopped
1/4 cup raisins
sugar to taste
salt to taste

Directions

1. Take a pressure cooker and heat the ghee under medium low flame.
2. Fry the cashew nuts and raisin in the ghee. Once the cashew turns slighly brown,  transfer the cashew nuts and raisins onto a plate.
3. Next add the shredded carrots to the remaining ghee in the pressure cooker and stir fry the shredded carrots for about 2-3 minutes.
4. Add the water to the carrots until the water is just covering all the carrots.
5. Put on the pressure cooker lid and cook for about 3 whistles.
6. Turn off the stove and release the steam by lifting the cap of the pressure cooker.
7. Once all the steam has been released, you can remove the pressure cooker lid. Put the cooker on medium heat and continue to cook the carrots until most of the liquid has evaporated. The carrots should be quite thick now.
8. Next add in the non fat milk powder and continue stirring.
9. Once the milk powder is mixed into the carrot mixture, add in sugar to taste.
10. Continue mixing the halwa until it forms ball.
11. Lastly add in the cardomom powder and the fried cashews and raisins and mix well.
12. Enjoy cold or warm.

Sunday, October 5, 2014

Steamed Fruit Cake

During my summer vacation in Malaysia, my lovely sis-in law bought this steamed fruit cake from a friend who brought this cake all the way from JB.  The cake was simply superlicious.  Steamed fruit cakes are one of the must haves during festive seasons in Malaysia. When I came back after my vacation, I pulled out this recipe that  I had in my recipe files and tried it out. It turned out simply wonderful and delicious and really moist. I steamed it for 4 hours but the cake is done in 2 hours actually. Steaming it for 4 hours helps to keep improve the cake's shelf life. But with a cake like this, it's probably gone in a day or two. This steamed fruit cake recipe is from Pn Hjh Rahimah's blog. She conducts cooking classes this is the recipe she uses in her class and many of her students have used this recipe to sell steamed fruit cakes. Thank you so much Pn. for sharing this recipe.


Ingredients

250 gm salted butter ( I used Kerry Gold)
300g granulated sugar + another 250gms of sugar for the caramel
6 large eggs
2 tablespoons vanilla essence

sift together
600 gm all purpose flour
2 tablespoons nutmeg powder( I used 1 tablespoon of mixed spice)
2 teaspoons baking powder
teaspoons cream of tartar
teaspoons bicarbonate of soda

600 gms mixed fruits (I could not get the mixed fruits here since it was not in season so I mixed, currants, raisins, orange and lemon peel that I made myself, red and green cherries)

Directions

1. Grease and line a  8" square cake pan. Prepare the steamer and add enough water and bring it to a  boil. Keep the steamer closed.
3. Beat butter with 300gms of granulated sugar until light and fluffly.
4. Add in eggs and beat well after each addition.
5. Add in the vanilla essence and beat well.
6. Turn the mixer speed to low. Mix the flour with the mixed fruits and fold add it the butter mixture a little at a time and mix well.
7. Turn off the mixer. Put a pan or non stick pan on medium heat and add the sugar. Keep a close eye on the sugar otherwise it will burn and the cake will taste bitter. Once the sugar turns golden brown, lower the heat to low and heat the caramel for a few second more to get a nice golden amber color. 
8. Turn off the heat and quickly and carefully pour the hot caramel into the cake mixer with the cake mixer on low speed. Use the cake mixer poring shield for safety since this caramel is really hot. 
9. Once the caramel is combined into the cake batter, pour cake batter into the cake tin and seal the cake tin with foil. Make sure that the tin is well sealed with the foil. 
10. Steam for about 2 hours or until done. Steam the cake for 4 hours if you want the cake to last long. Add boiling water to the steamer occasionally since you dont want the water in the steamer to dry out.
9. Once the cake is done, cool in the pan for about 10 minutes and the remove it to a rack. Cool completely before cutting the cake. Enjoy.


Saturday, October 4, 2014

Simple Salmon Fried Rice

I saw this recipe from Nami of Just One cookbook one morning. This is such a simple and easy recipe with the ingredients just within reach but the taste is out of this wold. Simple but yet so tasty. I fixed the kids lunch in a jiffy. Thank you so much Nami, you recipe helped me a make a quick and delicious and also healthy lunch for my kids. I tweaked the recipe a little based on what I had in my refrigerator.

Ingredients 

some left over teriyaki Salmon, cut into medium sized cubes
2 cups day-old cooked rice (I used the Korean medium grain rice)
1 green onion, chopped
1 red chilly, sliced thinly
1 tsp soy sauce
1/4 tsp salt or to taste
1/4 tsp white pepper powder
2 eggs, beaten
2 tablespoon vegetable oil.

Directions

1. In a hot pan, heat 1 tablespoon of cooking oil. Pour the beaten eggs into the hot oil and quickly scramble the eggs. Transfer the eggs to a bowl.
2. In the same pan, heat the remaining oil and fry the chopped green onions and red chilly.
3. Once the green onions and chilly are slightly wilted and aromatic, add in the teriyaki salmon and stir well.
4. Next add in the cold rice and scrambled eggs, salt, white pepper powder and soy sauce and mix well. Stir fry the rice until all the ingredients are well mixed.
5. Dish the fried rice and serve.

Rempeyek Kacang Ikan Bilis

One of my Indonesian friend recommended an Indonesian restaurant that serves authentic Indonesian food. We decided to give this restaurant a try and one Saturday, we made a visit to this restaurant. The food was OK. Not too authentic for my taste buds though but it was fine. I ordered some snacks as appetizers while we were waiting for our food and this Indonesian snack was so light, crispy and savory. These snacks are called rempeyek in Malaysia and I believe they are called the same in Indonesia as well. Rempeyek are savory rice snacks which are topped with peanuts and dried anchovies or ikan bilis.


Ingredients

A: Sift together 100 gms rice flour (thai rice flour) 25g tapioca flour 25g Hoen Kwee flour 2 tsps Knorr Chicken Powder ½ tsp salt or to taste
B: Wet Ingredients, mix together
200 gms water or more to get a watery consistency ½ cup coconut milk
C: Grind together 4-5 cloves of garlic 1 tsp cumin 1 tsp fennel 1 tbsps coriander seeds 10 dry chillies
D: Toppings Peanuts, raw Ikan Bilis
Directions

1. Mix A, B and C together. Add more water if needed to get a thin batter. If batter is thick, rempeyek will take longer to cook and will not be that crispy. 2. Heat a wok with oil under medium heat and make sure that the sides of the wok is also coated with oil. 3. Take a ladle of batter and add some peanuts and ikan bilis to the ladle full of batter. 4. Pour the batter along the side of the wok, just above the hot oil. 5. Let the batter fry for a while before pushing the batter that is sticking to the sides of the wok into the oil. 6. Fry until the peanuts are cooked and the batter is crispy. 7. Drain the rempeyek upright on paper towels, to absorb the extra oil. 8. When all the rempeyeks are fried, heat an oven to 300 F and put the rempeyek in the hot oven for just 5 minutes. This is my way to ensure that the rempeyeks are not oily.

Friday, October 3, 2014

Thengai Paal Appam without Yeast


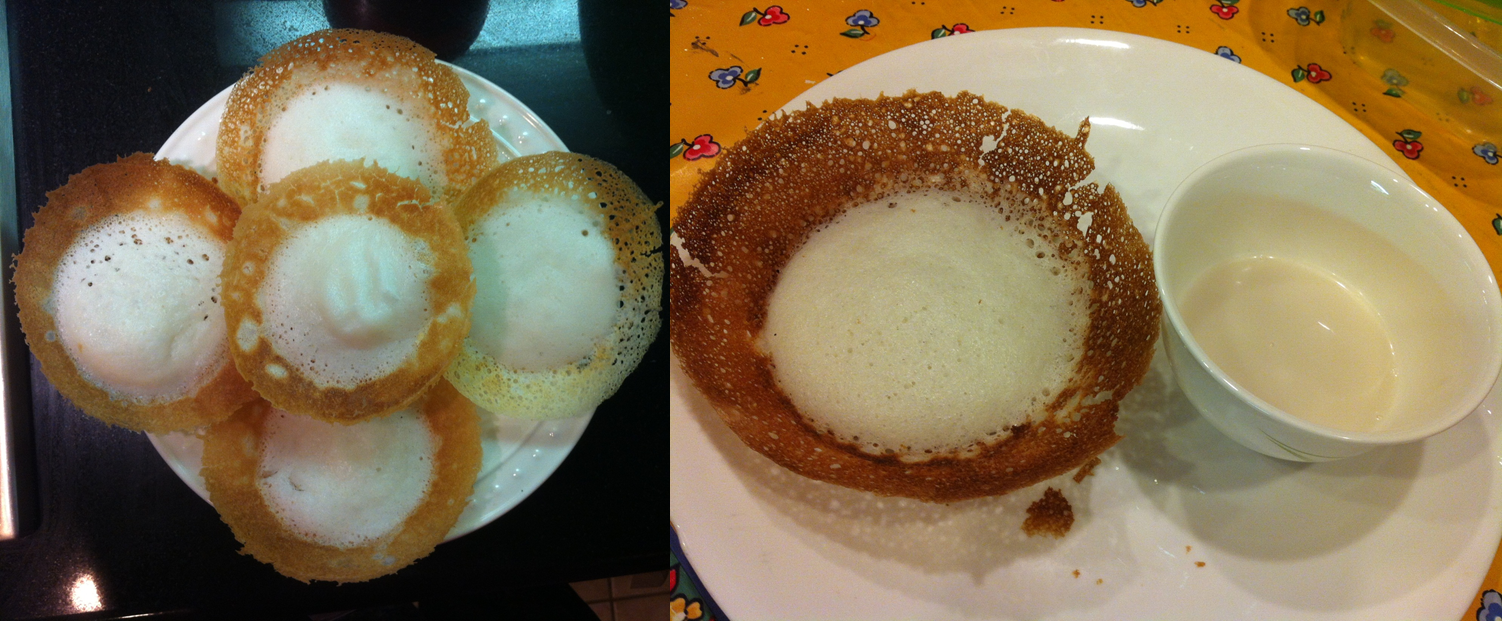
I just love eating the sweet thengai paal (coconut milk) appams. My mom makes the best appams I have ever eaten. She makes it so well, just like all the rest of the food she makes. There is no yeast in this appam. My mom said that when she was very young, her aunt (Periamma) used to make appams with baking soda but would not give the recipe to anyone. When her aunt made appams,she would add some roasted skinned mung beans on the appam. My mom used to make these type of special appams when I was young and until today whenever I make appams I add the roasted mung beans to my appams. Sadly I am the only one in my family who likes the appam this way. My dad loves to have an egg on the appam and he used to eat his appam with fish curry!
Appams with sweet coconut milk


Looks at the tiny air cavity caused by the fermentation process

Appam My Way..with brown sugar, coconut cream and roasted skinned mung beans..Yummm

 Ingredients

1 1/2 cups rice
1/2 cup of cooked rice

1/2 cup coconut water, leave it in a warm place overnight if available to aid in the fermenting (my mom never used this)
1/2 teaspoon salt
tbps of dosa batter (optional, help the fermentation process)

1 tablespoon sugar
1/2 tsp baking soda
Sweet coconut Milk

for the sweet coconut milk
1 cup of coconut milk (either fresh,from the box or can)
1 cup of water
1/2 cup of sugar
a pinch of salt
some daun pandan (screwpine leaves) or cardamom powder.

Batter ready to be fermented overnight or for at least 8 hours 


After overnight fermentation, batter is full of tiny air bubbles
The batter consistency

Appams cooking in appam pans


Directions

1. Wash the rice and soak the rice with the cooked rice overnight for about 2 hours. Make sure that the water is more than enough to cover the rice.
2. The next day, grind the soaked rice, cooked rice, coconut water(if using) and water to a smooth paste. 3. Appam batter should not be as thick as dosa batter, so add water a little at a time until you get a smooth batter which is a little runny. I will add a video to this post the next time I make appams.
3. Add a little bit of salt to the batter and mix the batter thoroughly with your hand until the batter is well mixed.
4. Place the batter in a warm place to ferment. Sometime when the weather is cold, I will place my batter in the oven with the oven light on.
5.  Once the batter is well fermented, take out the batter and the sugar and baking soda and mix well. Add more water or diluted coconut milk if needed if the batter is too thick. Getting the right batter consistency comes with practice.
6. Keep the batter for about an hour before making the appams.
7. In the mean time prepare the sweet coconut milk. Heat the coconut milk with some water, sugar, salt and daun pandan (screwpine leaves). Dont let the milk boil. Adjust the sweetness to your liking.
8. Heat an appam pan with some oil and pour a ladle of batter in the pan and swirl the pan until the sides are coated with the batter. Cover and let it cook on medium low heat for about five minutes or so. If the appam is fully cooked, the top of the appam will bounce back when touched. The sides should be golden brown and crispy.
9. Serve the appams with the sweet coconut milk and enjoy.


Wednesday, October 1, 2014

Vegan Kaya

I brought back 2 bottles of Kaya when I went back home for the summer holidays. The kaya tasted so good that both bottles just vanished within 2 days. Lately Mav has been asking for bread and kaya. I kept putting it off and finally succumbed to his demands and decided to make some for him. Little did know that I would succeed in making kaya withouts eggs. That is right, a vegan kaya and it is so simple and it just takes less than 10 minutes to make.


Ingredients

1 can of coconut milk, 400g
1/2 cup of dark brown sugar
2 tablespoons of gula merah or gula melaka(similar to piloncillo sugar), optional. I used for extra taste and color
2 tablespoons of corn starch mixed with 1/4 cup of water
a few pandan leaves
a pinch of salt

Directions

1. Pour the can of coconut milk into a pan with the pandan leaves and heat in on medium low heat.
2. Add in the salt, brown sugar, gula merah or gula melaka, if using and mix with a whisk until the sugars dissolve.
2. Once the coconut milk starts to boil, add in the corn starch water a tablespoon at time and whisk it into the coconut milk until you get a thick but still runny jam. You might not have to use all the corn starch water. The coconut jam will thicken when it cools down.
3. Transfer the jam to a clean and dry jar and leave it to cool.

Note:
1. Mix the corn starch water well before adding it to the coconut milk since the corn starch will settle down.
2. The jam should not be too thick so add the corn starch water a tablespoon at a time and mix it well into jam before adding the next tablespoon.

Korean Jap Chae

Last year when I youngest was in 1st Grade, his school hosted an event where families from the different cultural groups presented their traditional food. In the Korean booth, the moms made Korean Jap Chae. I was on a vegan diet that day and I was so happy when I found out that the Jap Chae that they made was vegetarian. I instantly fell in love with this food. I have made this several times and both of my older kids just love it. Mav of course hates it since it is loaded with vegetables. Well you can't please them all.


Ingredients

500g sweet potato noodles or korean vermicelli
1 medium sized carrot, julienned
2 red chilies, julienned
300g shitake mushrooms, sliced thinhly
300g spinach
1 tsp chopped garlic
some chopped green onions
salt to taste
sesame seeds

for the seasoning

mix together:
1/3 cup soy sauce
1/3 cup sugar
2 tablespoon sesame oil
1 tsp black pepper

Directions

1. Wash the spinach several times. Boil some water and scald the spinach leaves. Once the spinach leaves are scaled, remove them quickly into a bowl filled with ice and cold water.
2. Drain the spinach and squeeze out any excess water. Add a pinch of salt and a dash of sesame oil to the spinach leaves.
3. In a wok, heat some sesame oil and fry the garlic under medium heat. Once the garlic is aromatic add the sliced mushrooms and fry until the mushrooms are soft. 
4. Next add in the julienned carrots and chilly and fry until the carrots and chilly are just cooked.
5. Lastly add in the sliced onions and chopped green onions and fry until the onions are slightly soft but still has the crunch.
6. Remove vegetables from the pan and leave it to cool.
7. Take a pot of water of leave it to boil. Add in the sweet potato noodles and cook for about 5 minutes or until the noodles are cooked. Drain the noodles in a colander and transfer it to a large bowl. 
8. Add the stir fried vegetables and spinach into the noodles and pour the seasoning over it.
9. Mix well with a thong and sprinkle some sesame seeds.
10. You can garnish the noodles with thinly sliced egg omelet. You can omit this for a vegetarian or vegan recipe.


Tuesday, September 30, 2014

Cajon Potatoes ala Barbeque Nation

During last summer holidays, we went back for a home trip for almost a month and during that time we made a quick trip to Chennai for a week.  While we were in Chennai we went to Barbeque Nation for lunch and they served this amazing potato salad that I loved so much and so did my youngest. I tried googling for the recipe and finally after a few months I came across this recipe which is apparently from a chef at Barbeque Nation! Thank you so much Chef, because with this recipe, I can finally make this potato salad that my son enjoys. Even my husband who dislikes potatoes, likes this recipe. I guess it is called Cajun Potatoes.

Ingredients

1 lb baby potatoes, washed and parboiled (just boil baby potatoes for about 5 mins and drain)
vegetable oil for deep frying.

for the cajun dressing:

original recipe calls for
1/4 cup of thousand island dressing
1/2 tsp of chilly powder
1/2 tsp of chaat masala
1 small shallot chopped

my version (tweaked as usual)
1/4 cup vegan mayo (I used Hampton Creek's vegan mayo - this is Gods answer to my prayers for a perfect vegan mayo
1 tablespoon of tomato ketchup
1 tsp of sriracha sauce
1 tsp chilly powder
1 tsp chaat masala
1 small shallot chopped
1 tablespoon of brown sugar
1/2 tsp of lime juice

Directions:

1. Prepare the sauce. Mix all the ingredients for the sauce in a bowl and leave it the fridge for about 1 hour or more since we want a cold dressing.
2. In  a deep pan heat some vegetable oil. When the oil is hot, deep fry the potatoes until they are crispy.
5. Add the hot crispy potatoes into the cold sajun dressing and serve.

Note.
1. Prepare the dressing in well and keep it in the fridge.
2. Deep fry the potatoes when you are ready to serve the food.
3. Adding the hot potatoes into the cold dressing helps to keep the potatoes crispy.

My husband and sons said that my version was better than the one they had at Barbeque Nation! :)

Sunday, September 21, 2014

Boondhi Laddoo


When I went back to home for summer holidays, I asked my mom is she was still having any use for the boondhi maker. She said that she had no use for it, in fact she was so happy that she could give it to me. Now that I have the boondhi maker, I tried to make some boondhi laddoos since it is one of Mav's favorite and also mine ;).  I using the recipe from Bhavna's kitchen with some slight addition. I like my laddoos with some cumin and black pepper. I used to buy laddoos from a punjabi lady back home at she used to sell these laddoos with melon seeds, cumin and black pepper. I remember now that I ordered laddoos from this lady for my brother's wedding too.

Ingredients

1 cup of besan or chickpea flour
1/2 cup or more water
2 teaspoons melted ghee
1 teaspoon cardamom powder
1 tablespoon melon seeds, slightly dry roasted
1 tablespoon pistachio nuts, chopped
some black pepper and cumin (optional)

for the sugar syrup

1 cup of sugar
1/2 cup of water or just enough to cover the surface of the water

Directions

1. Mix besan with ghee in a bow. Gradually add with water until you get a thick pouring consistency.
2. Leave the besan batter aside.
3. Next prepare the sugar syrup. Boil sugar and water until you get a one thread consistency or if you measure it with a sugar thermometer, it should read anywhere between 220º F - 222º F.  Please refer to my post on sugar syrup consistency for indian desserts here.
4. Remove the sugar syrup from the leave it aside.
5. Next heat a pan with cooking oil under medium heat.
6. With the boondhi maker over the hot oil, pour the besan batter into the boondhi maker and gently  shake the boondhi maker. Make sure that the boodhi maker is just above the hot oil. Fry the boondhi and drain them on a kitchen towel. Continue this step with the remaining mixture.
7. Add the fried boondhis to the hot sugar syrup. Add cardamom powder, melon seeds and pistachio nuts. You can also add the black pepper and cumin if using.
8. Leave the boondhis to soak in the syrup for about 20 - 30 minutes. Once the boondhis are warm enough to handle, grease hands with some ghee and shape the boondhis into small balls. 

Note. I had a hard time trying to shape the boondhis, so I roughly shaped the boondhis and then I wrapped the laddoos in a greased plastic sheet and shaped them into smoother balls.